IBM Aspera Node Creation
1. In the Aspera on Cloud Admin app, Go to Nodes and storage > Nodes > Create new.
- Click Attach my cloud storage tab.
- Node name:
aspera-immersion-day[This name refers to the AWS S3 storage] - In the Storage field, select Amazon S3.
- In the Region field, select
us-east-1 - In the Storage class field, select Standard.
- Copy the trust relationship policy contents and leave this page open. We need to create an IAM role in the AWS account with the provided policy.


2. Create an Aspera IAM Role and Policy.
- Log in to the AWS portal. Go to Services > IAM > Roles.
- Click Create Role.
- Select Custom trust policy for trusted entity type.
- Paste the provided trust relationship policy contents in the editor.
- Click Next.


3. Create an Aspera policy to allow S3 access.
- Click Create policy.
- Click the JSON tab.

4. Copy the following JSON policy.
{
   "Version":"2012-10-17",
   "Statement":[
      {
         "Sid":"VisualEditor0",
         "Effect":"Allow",
         "Action":[
            "s3:PutObject",
            "s3:GetObject",
            "s3:AbortMultipartUpload",
            "s3:DeleteObject",
            "s3:ListMultipartUploadParts"
         ],
         "Resource":"arn:aws:s3:::bucket-name/*"
      },
      {
         "Sid":"VisualEditor1",
         "Effect":"Allow",
         "Action":[
            "s3:ListBucketMultipartUploads",
            "s3:ListBucket",
            "s3:GetBucketLocation"
         ],
         "Resource":"arn:aws:s3:::bucket-name"
      }
   ]
}
5. Paste it in the IAM policy editor.
- Replace/modify the resource bucket name with the name of your S3 bucket.
- Click Next:Tags.
- Click Next:Review.**
-> CLICK HERE to see how to find your S3 bucket names.
1. Navigate to AWS Cloudformation > Stacks > Select your S3 Stack > Outputs.
- Select the Outputs tab.
- Copy the S3 Bucket name that starts with aspera-transfer-.


6. Review and Create Policy.
- Policy Name:
aspera-s3-policy - Click Create policy.

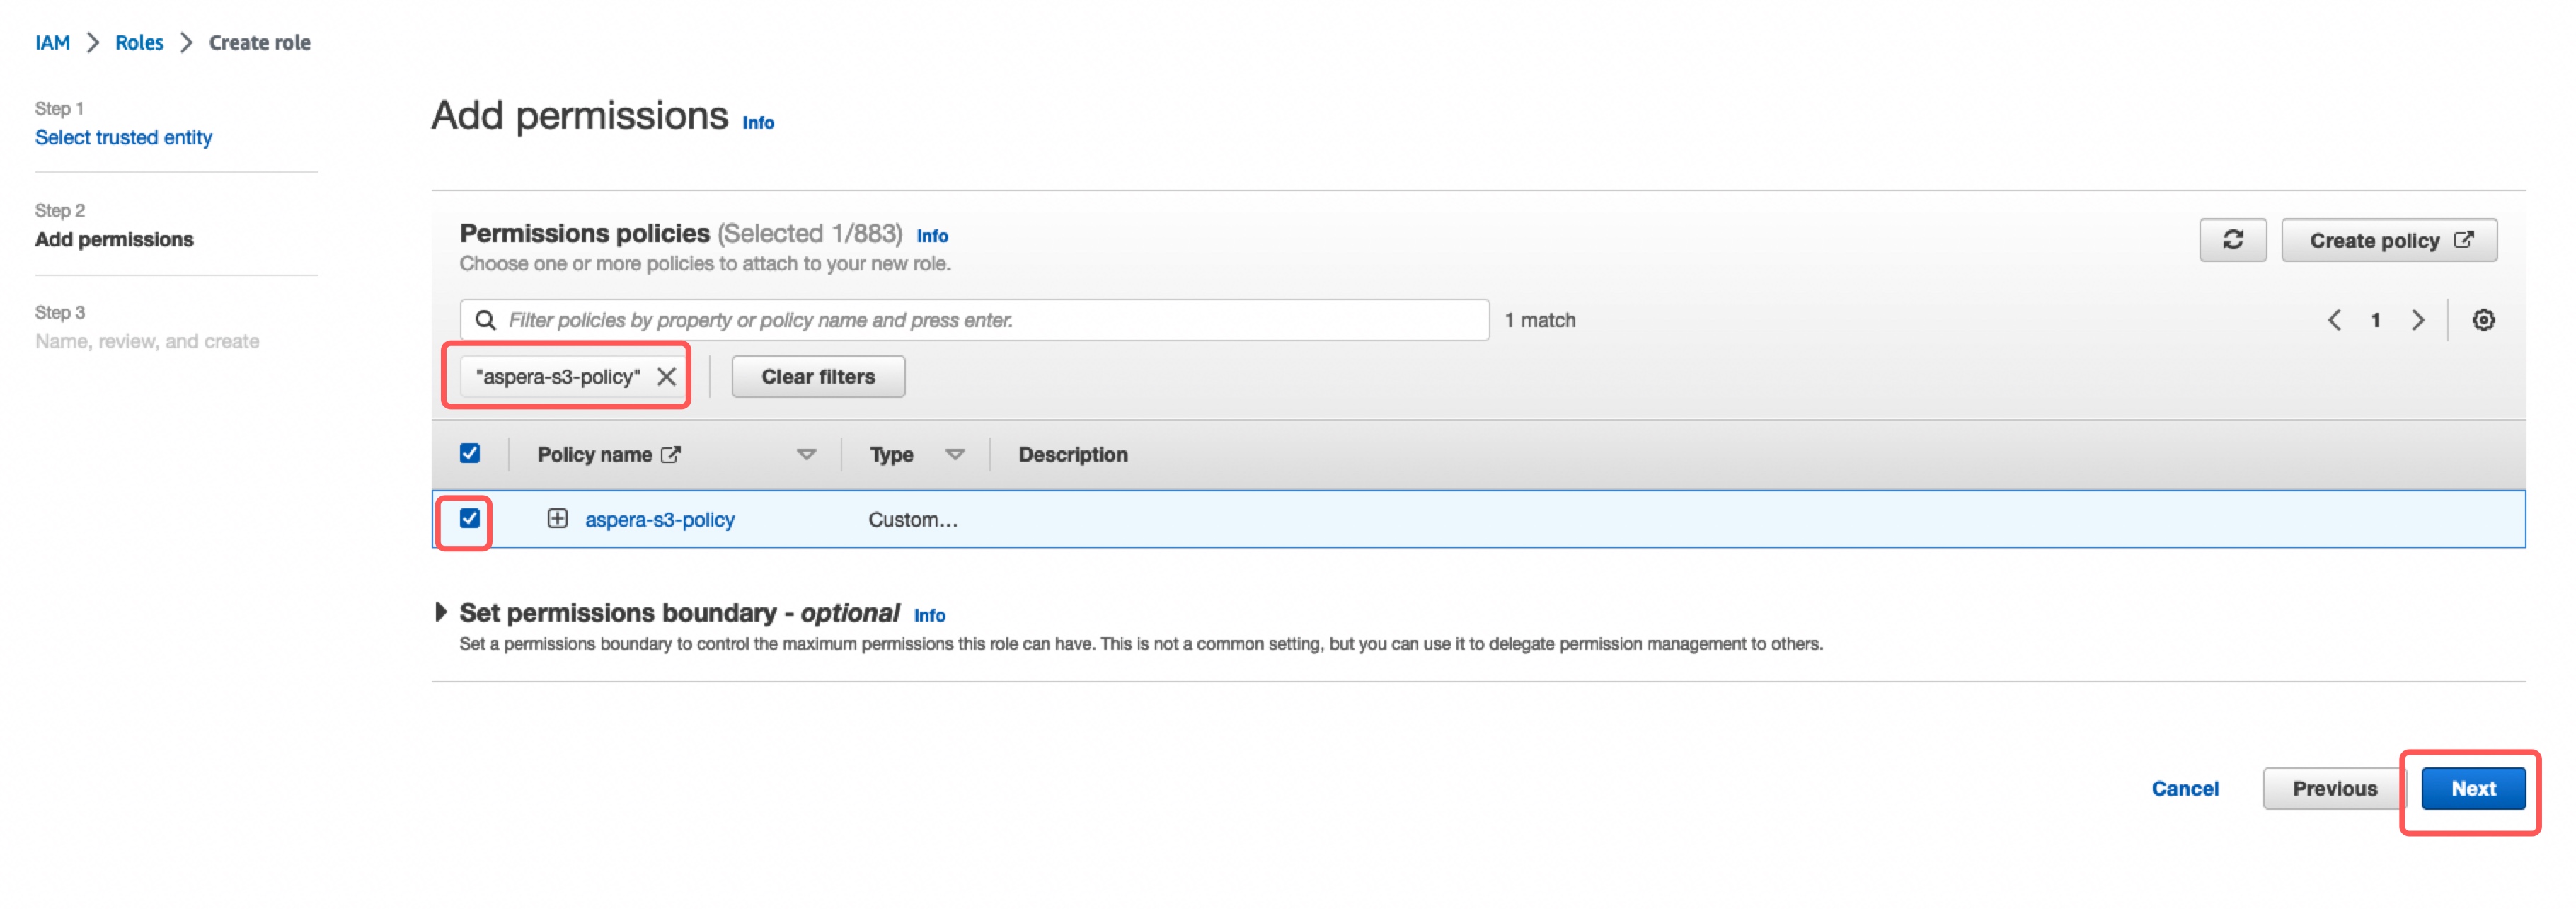
7. Attached the Aspera policy to the Aspera role.
- Back on the Role Creation page, click the refresh button next to Create Policy
- Search for the policy by name:
aspera-s3-policy - Check the box to select.
- Click Next.
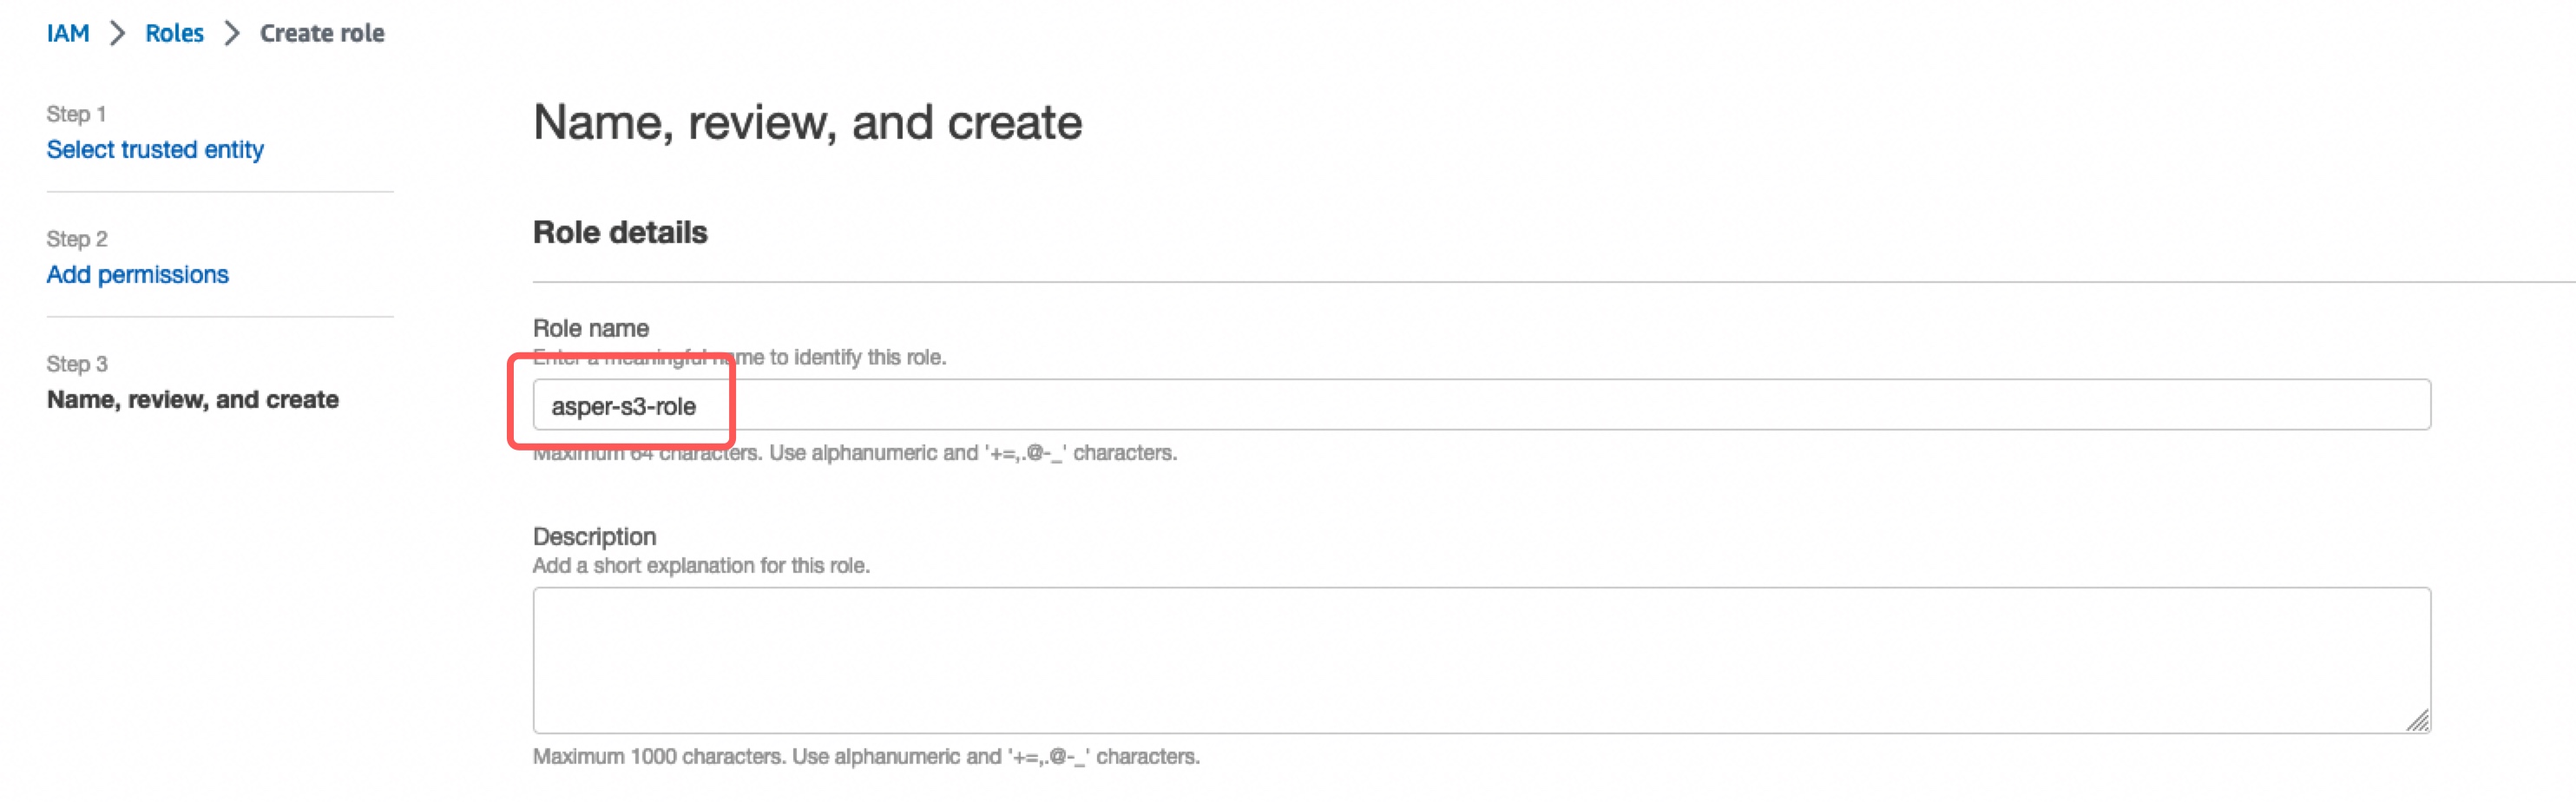
8. Name, review and create role.
- Role Name:
aspera-s3-role - Create role.
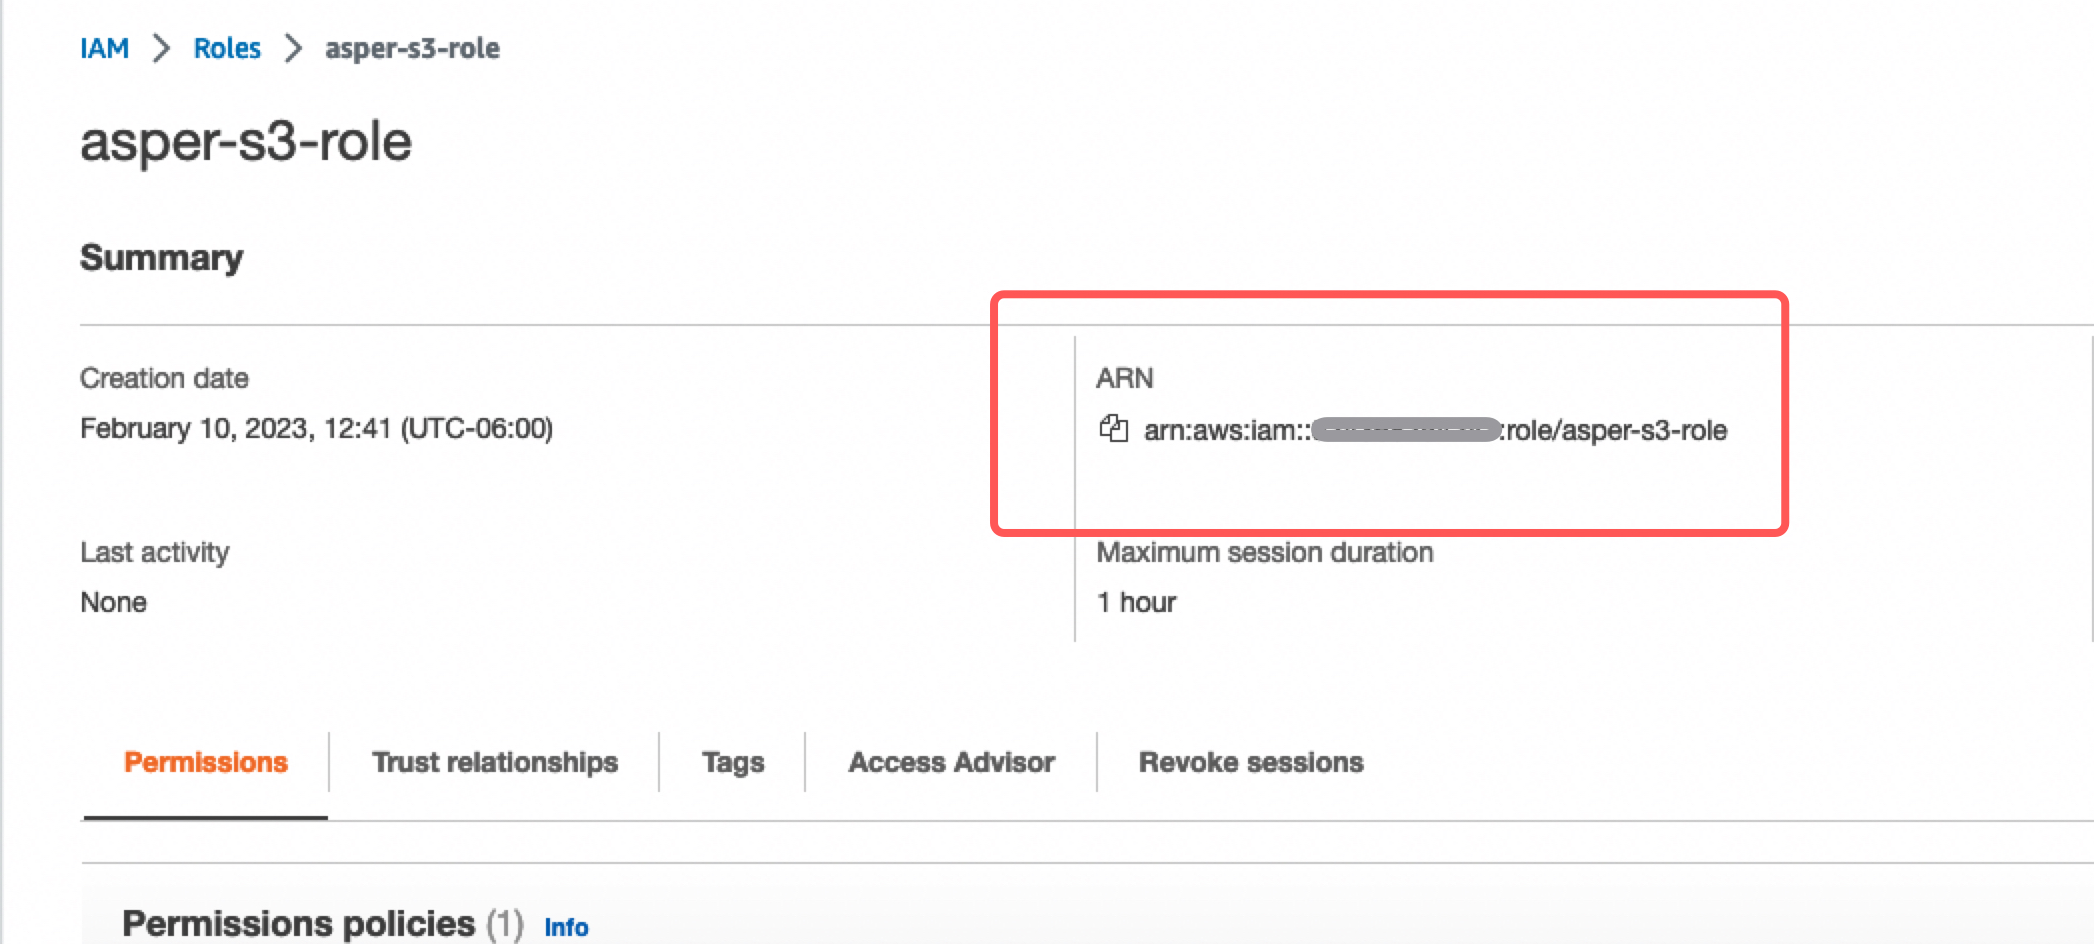
9. Search for the aspera-s3-role and copy its ARN.
Complete Node Creation
1. Return to the IBM Aspera admin portal.
- For IAM role ARN: Paste the aspera IAM role arn.
- Bucket:
the name of your bucket - Path:
/ - Click Create.
If the connection fails, refresh the webpage. Repeat the steps above and update the IAM trust policy in AWS created before with the latest provided.
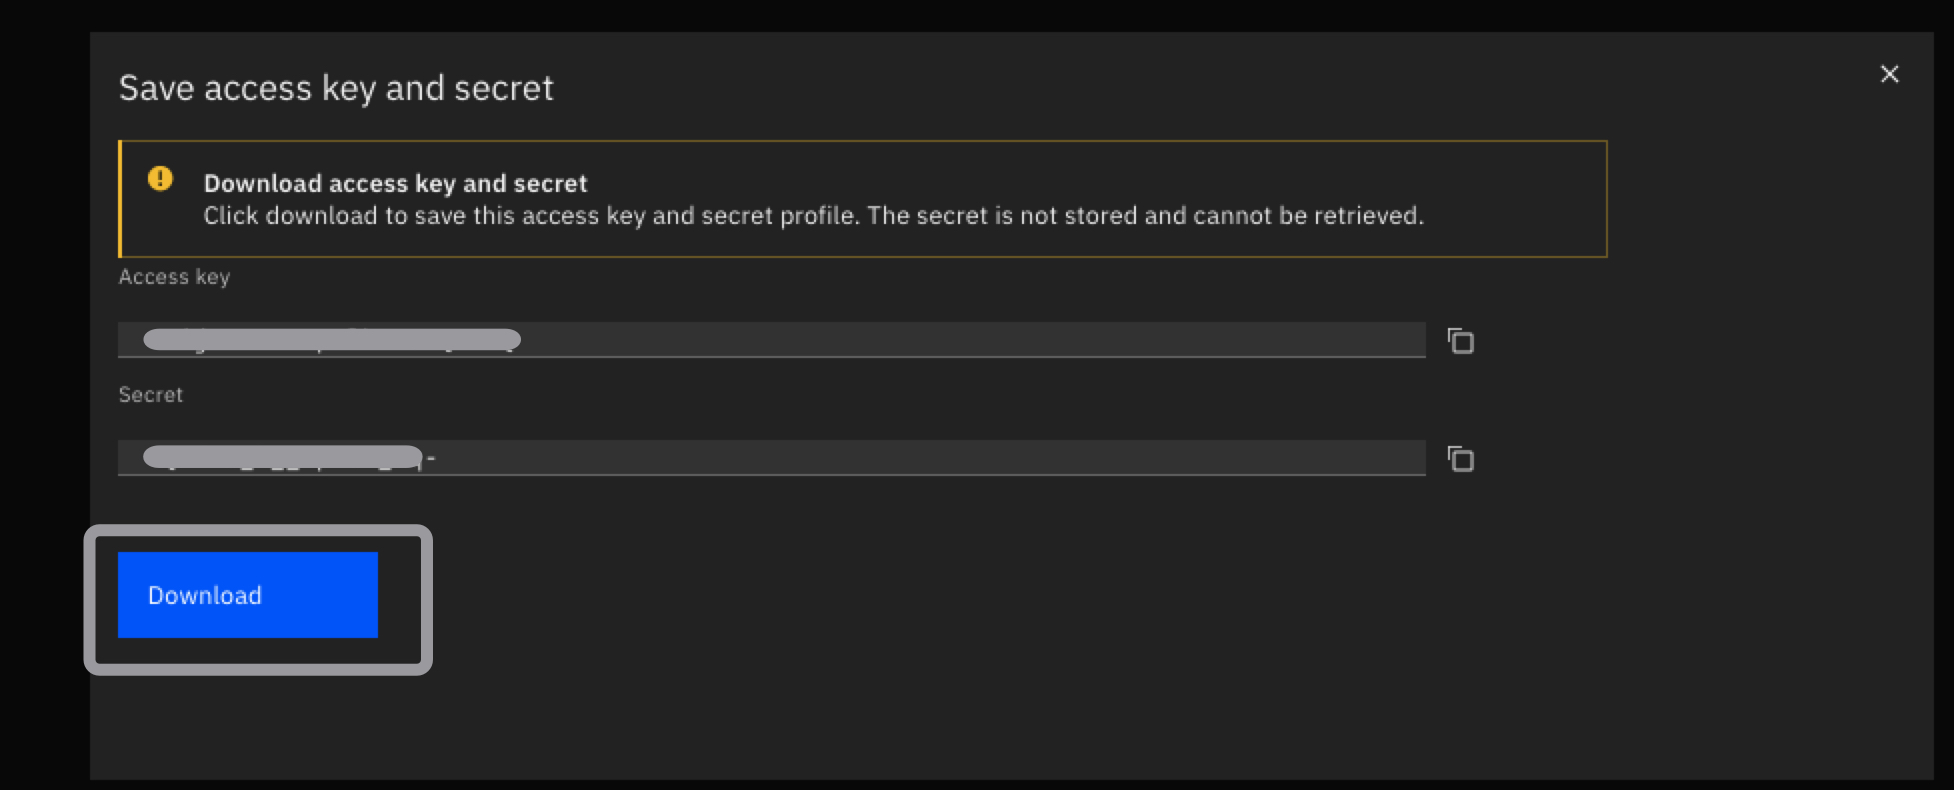
2. Download and safely store your access keys.