Validate and Inspect
Validate an Object
1. After successful upload navigate to S3 and find your S3 bucket that you defined to be scanned by File Storage Security.
2. Examine the tags applied from the scan results.
- Scroll to the Tags section, you will see the details like the example below:

Look for the following tags:
fss-scan-date: "date_and_time"
fss-scan-result: "malicious or no issues found"
fss-scanned: "true"
The tags indicate that File Storage Security scanned the file and tagged it correctly as malware. You have now tested your File Storage Security deployment 👍
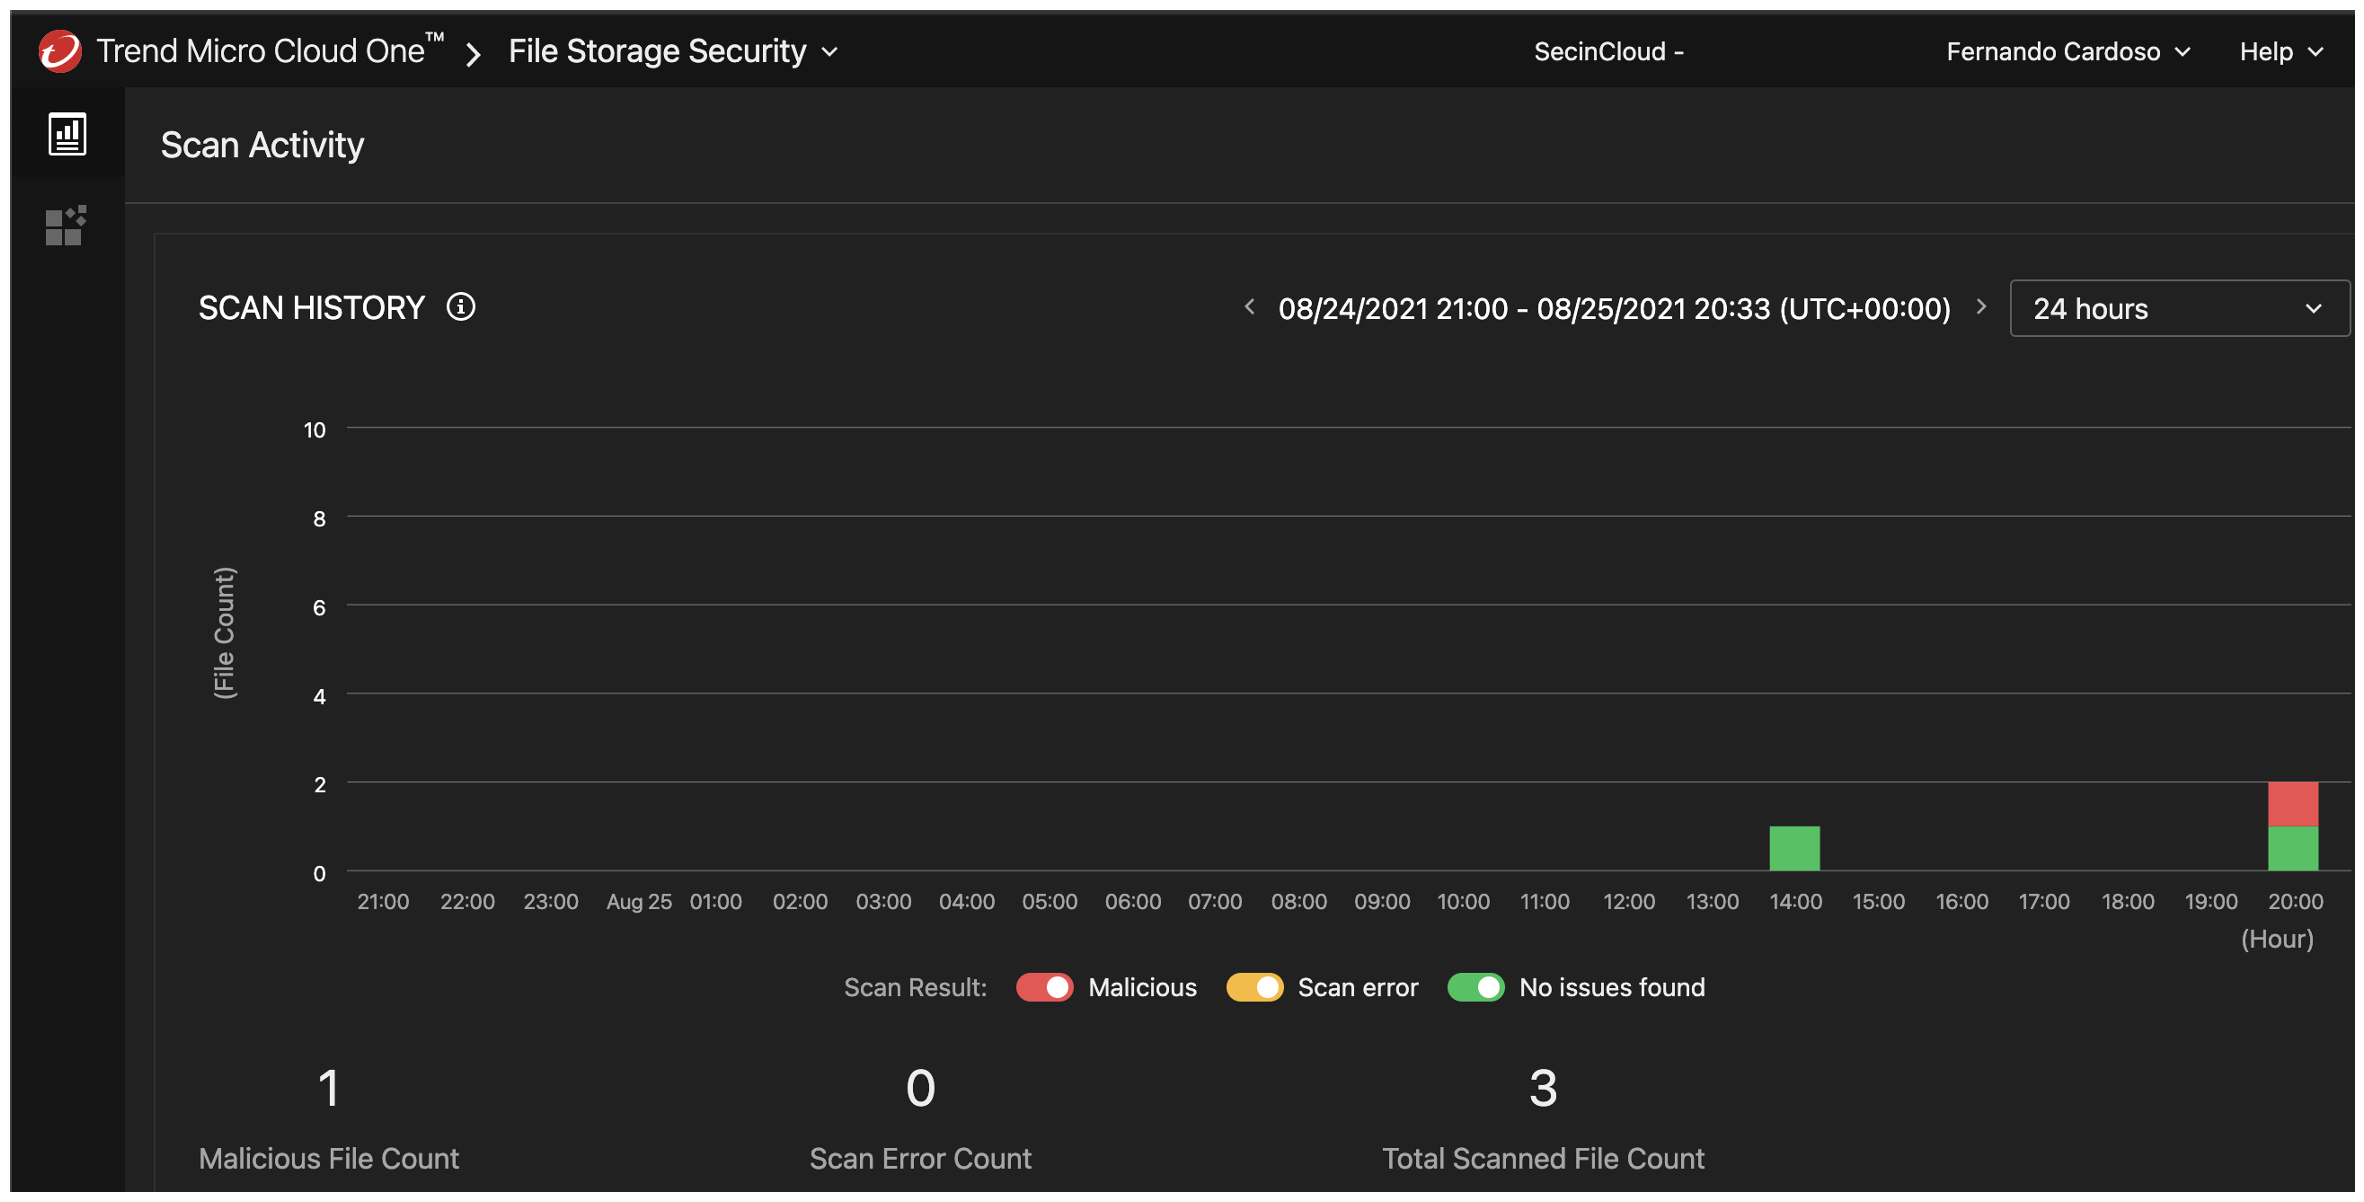
You could also check in the File Storage Security dashboard to see how many files have been scanned and flagged as malicious.
Monitoring your Scans with CloudWatch
-> CLICK HERE to see how to check in CloudWatch.
File Storage Security logs are in AWS CloudWatch Logs. These logs contain a bit more information than what’s available in the fss-* tags.
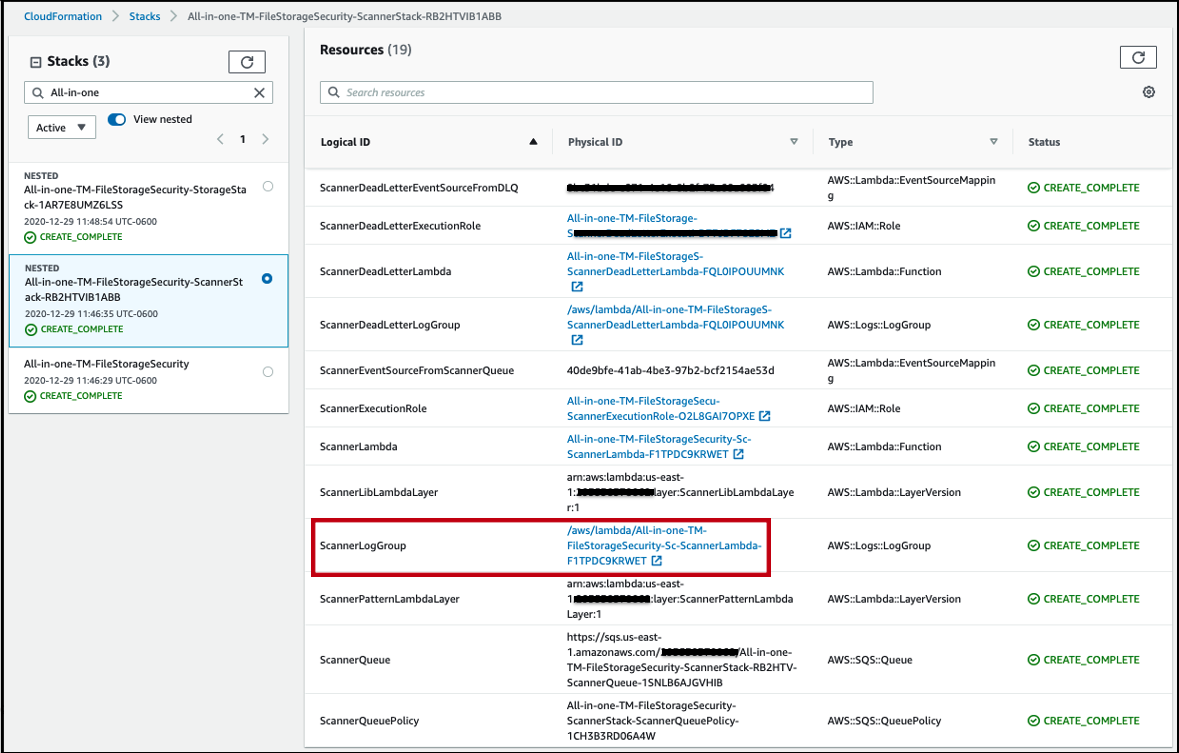
1. To view the scan result logs in AWS CloudWatch Logs, go to your AWS account, in CloudFormation > select your scanner stack > Resources > ScannerLogGroup link.
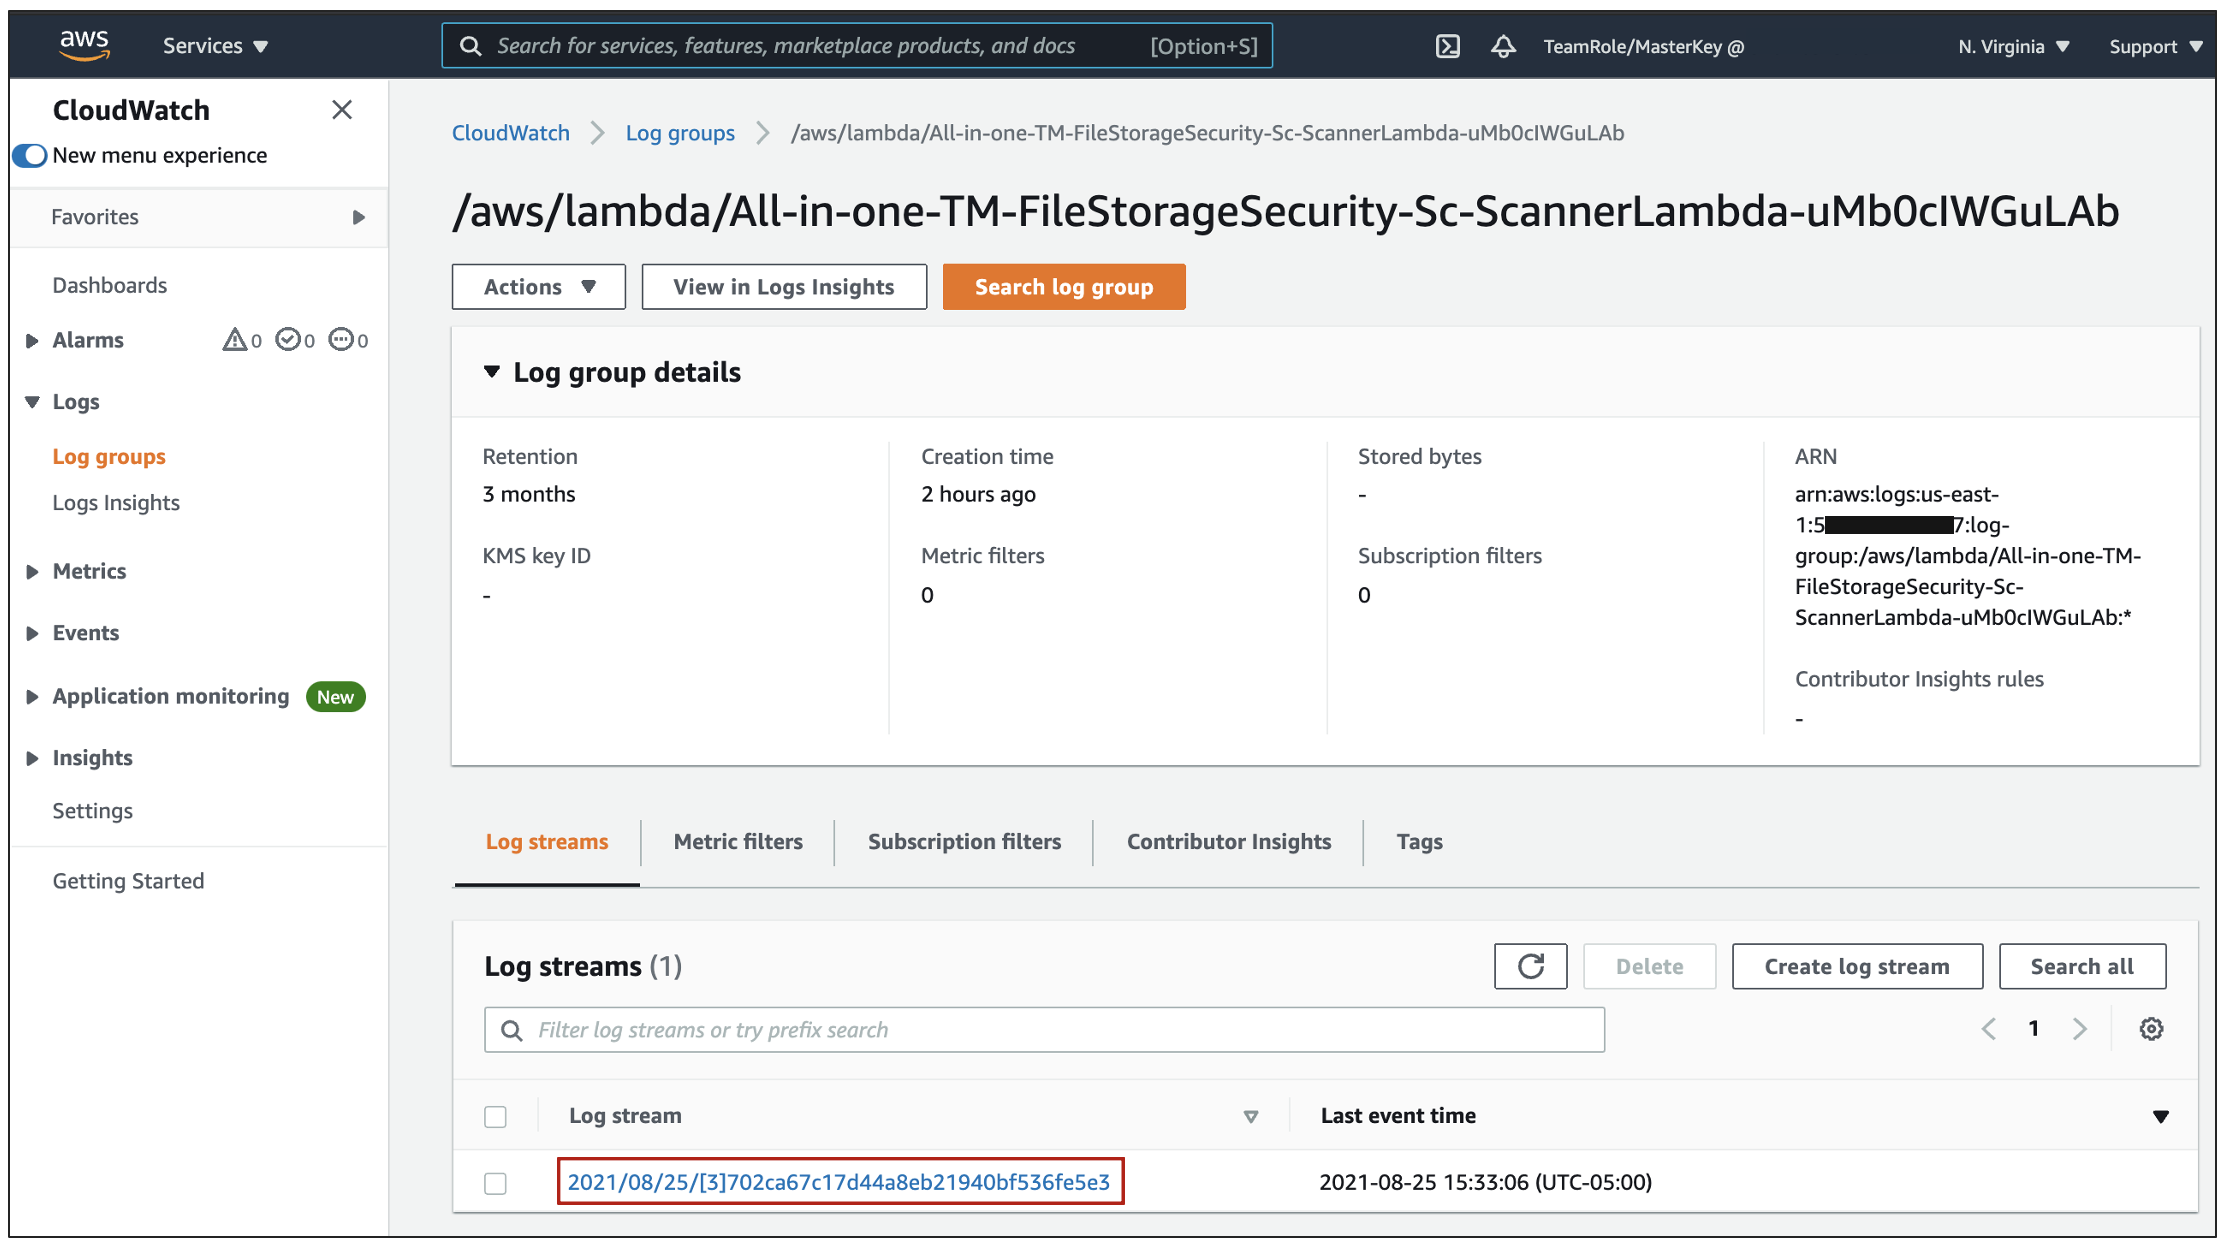
2. The AWS CloudWatch service appears with Log groups selected on the left. Under Log streams, click on a log stream with a latest event time that is later than or equal to the time when you added the file to the Amazon S3 bucket to scan and expand the event message that starts with scanner result.
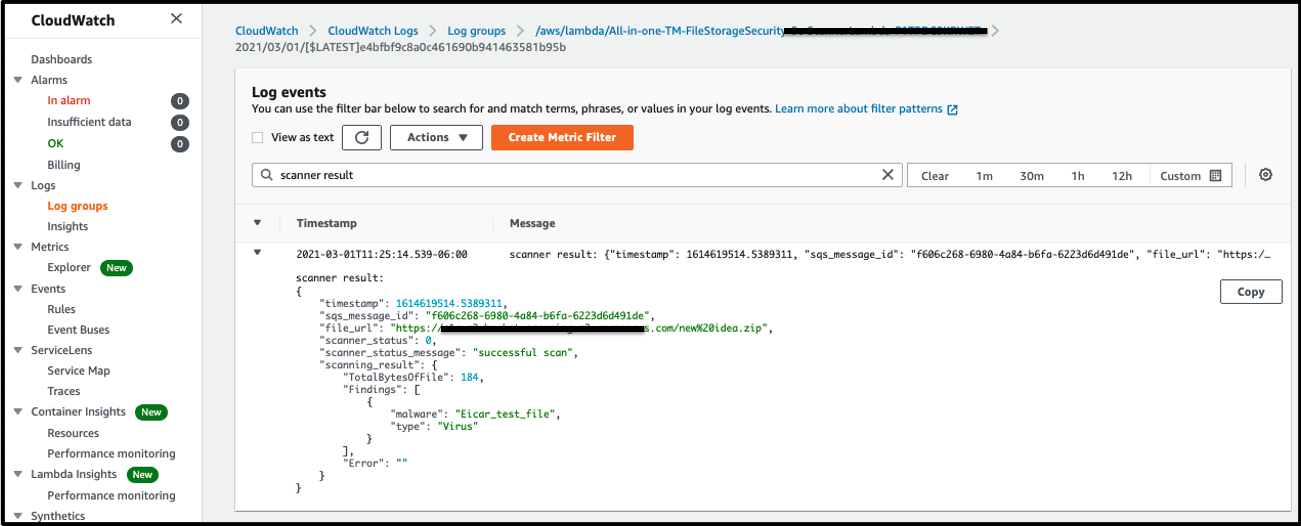
3. Log event will show up and you will see JSON code block appears containing information about the scan and some additional details about about the Lambda Scanner.
Add to the Filter Events: scanner result
Now you will see the security events based in the File Storage Security Scanner, like:
- timestamp: A unique number that corresponds to the time when the scan occurred.
- sqs-message-id: The unique ID of this event.
- file_url: The URL to the scanned file in Amazon S3.
- scanner_status and scanner_status_message
The scanner_status has the following values:
-
0: “successful scan”: Indicates that the scan finished successfully.
-
-1: “invalid license status”: Usually indicates that File Storage Security is not fully configured. The most likely reason for an incomplete configuration is that ARNs have not been submitted through the File Storage Security console or API yet. For instructions on submitting the ARNs, see Add Stacks or Deploy stacks using the API. This message could also indicate that your license is not valid, or that File Storage Security was not able to push a new license to your stack.
-
-2: “unsuccessful scan”: Indicates that the ScannerLambda function was unable to scan the file.
-
-3: “scanner error”: Indicates that an internal error occurred in the ScannerLambda function.
-
-4: “unsuccessful scanner invocation”: Indicates that the ScannerLambda function couldn’t finish the scan. Either the scan timeout was reached, or there were too many files to scan causing a Lambda throttling error. scanning_result: Indicates scan details such as the scanned file’s size as well as any found malware or errors.
Additional Query using CloudWatch
1. You can search for scan results using AWS CloudWatch Logs Insights. Here is an example on how to set up a query:
- In AWS, go to the CloudWatch service.
- On the left, under Logs, click Logs Insights.
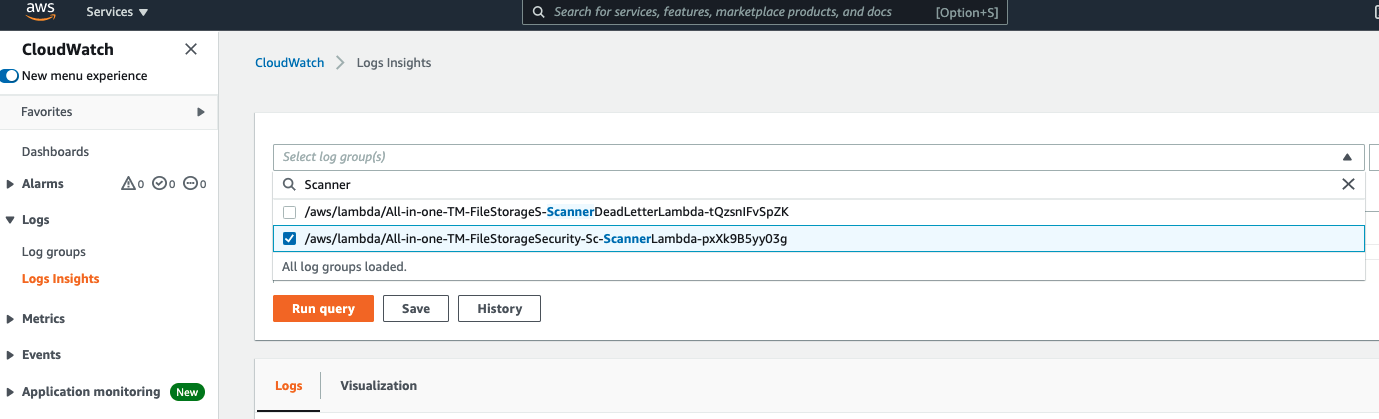
- In the main pane, click inside the Select log group(s) field, and enter
ScannerLambda - Select the Log Group that only contains “ScannerLambda” together like the example below
2. Replace the contents of the text box with the following lines and click in Run Query:
fields @timestamp, @message
| filter @message like "scanner result"
| sort @timestamp desc
| limit 20
This query finds all scan results, up to a maximum of 20.
Set the time or date range using the available buttons.
If you were expecting results and don’t see them, try setting a broader time or date range.
3. You should be able to see the events that you generated:
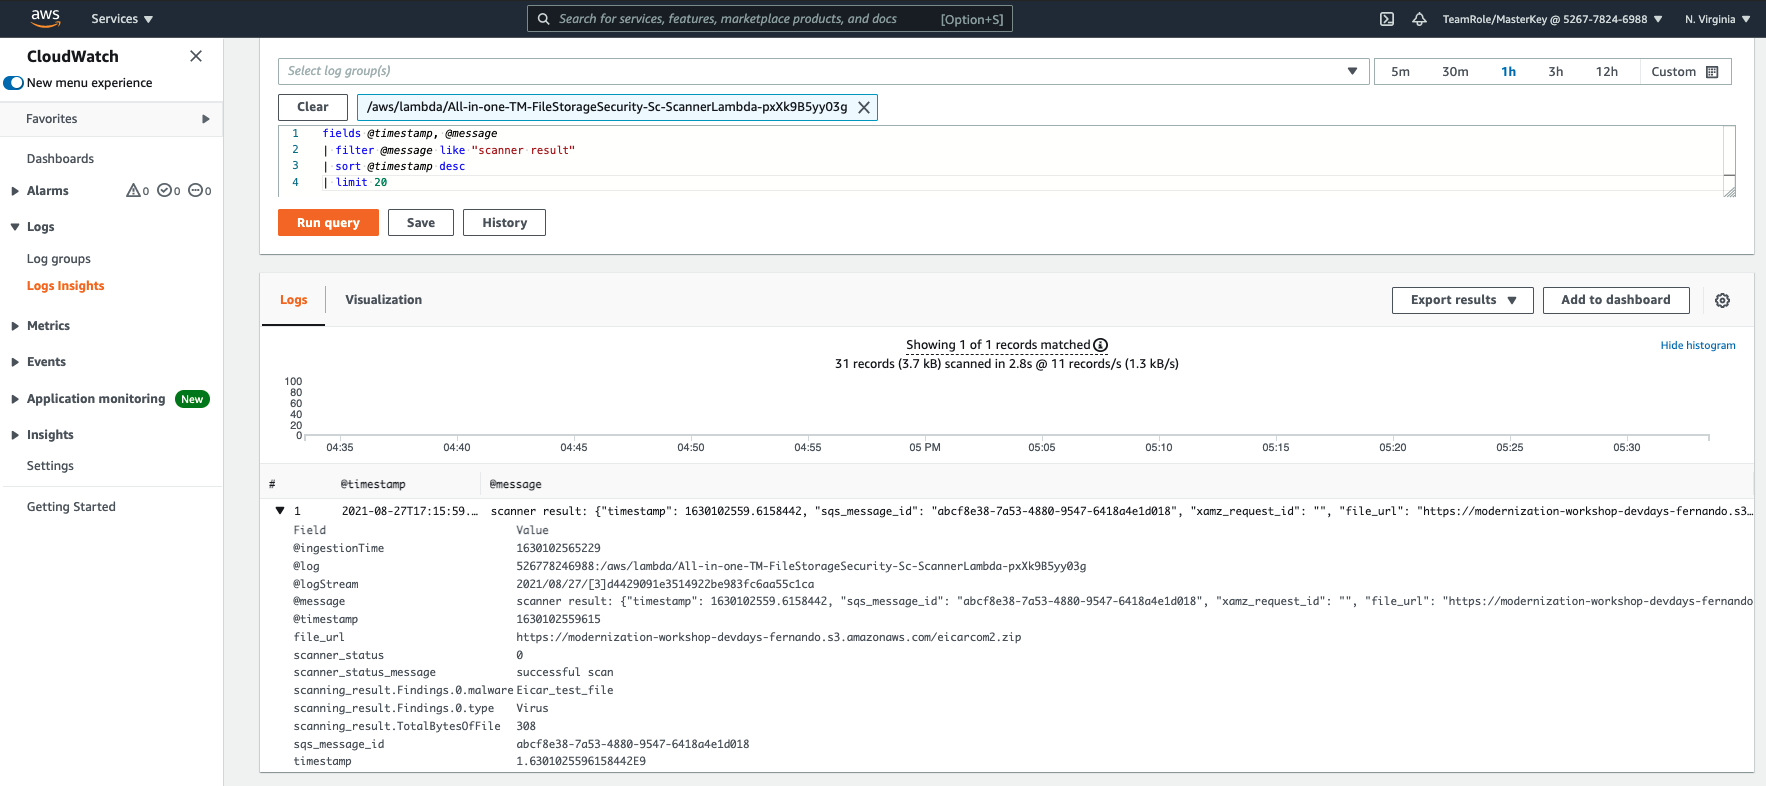
4. By expanding the details of the event, you will be able to see the event detail generated by File Storage Security in a JSON format:
"scanner result":{
   "timestamp":1630102559.6158442,
   "sqs_message_id":"abcf8e38-7a53-4880-9547-6418a4e1d018",
   "xamz_request_id":"",
   "file_url":"https://modernization-workshop-devdays-fernando.s3.amazonaws.com/eicarcom2.zip",
   "scanner_status":0,
   "scanner_status_message":"successful scan",
   "scanning_result":{
      "TotalBytesOfFile":308,
      "Findings":[
         {
            "malware":"Eicar_test_file",
            "type":"Virus"
         }
      ],
      "Error":"",
      "Codes":[

      ]
   }
}
You did it 🎉!
Now that you know how to verify File Storage Security logs and events in AWS CloudWatch you can create your own automations based on CloudWatch data 🚀